진행OS

KT Cloud 사용
준비물
1. 모니터링 서버
- APM 설치 (https://hee611.tistory.com/33)
- 방화벽 80 해제
2. 클라이언트 서버
[ 모니터링 서버 ]
Nagios Core 설치하기
1. Nagios Core 및 가동에 필요한 패키지 설치
- 내용이 길어서 인용문으로 작성
yum install gcc glibc glibc-common wget unzip gd gd-devel xinetd perl-Net-SNMP gcc glibc glibc-common make gettext automake wget openssl-devel net-snmp net-snmp-utils epel-release gcc glibc glibc-common make gettext automake autoconf wget openssl-devel net-snmp net-snmp-utils mail sendmail perl perl-CGI
2. 유저, 그룹 생성
# 유저 생성
useradd nagios

# 그룹 생성
groupadd nagcmd

# nagios와 apache를 nagcmd 그룹에 추가
# 웹으로 화면을 보기 때문에 추가해준다.
usermod -G nagcmd nagios
usermod -G nagcmd apache
3. Nagios Core 설치
# 설치를 받을 디렉토리 이동
cd /usr/local/src

# Nagios Core 설치 - 오래걸림
# 이름을 별도로 지정하고 설치 했으니 nagioscore.tar.gz 로 보일것
wget -O nagioscore.tar.gz https://github.com/NagiosEnterprises/nagioscore/archive/nagios-4.3.4.tar.gz

# .tar.gz 압축 해제
tar xvfz nagioscore.tar.gz

# 압축 해제 후 해제된 파일 경로로 이동
cd nagioscore-nagios-4.3.4/

# Nagios Core 컴파일
./configure
make all

# Nagios Core 바이너리 설치
make install
4. Nagios Core 서비스 등록
# 입력 경로 /usr/local/src/nagioscore-nagios-4.3.4

# 서비스 등록

# /etc/init.d/ 등록
make install-init

chkconfig --add nagios

# nagios라는 유저가 없다면 에러가납니다.
# 위에서 유저, 그룹 생성한 곳을 빼먹지 않았나 체크 해보세요
make install-commandmode
5. Nagios Core 구성파일 설치
# 입력 경로 /usr/local/src/nagioscore-nagios-4.3.4
# /usr/local/nagios에 설정 파일 생성
make install-config
Apache
1. Apache 구성파일 설치
# 입력 경로 /usr/local/src/nagioscore-nagios-4.3.4
# /etc/httpd/conf.d/nagios.conf 생성
make install-webconf
2. httpd.conf 파일 수정
# vi 편집기로 열 파일 경로
vi /etc/httpd/conf/httpd.conf

# /LoadModule 검색
# 아래 줄 추가
LoadModule cgi_module modules/mod_cgi.so
Include conf.d/nagios.conf

# /AddHandler 검색
# 해당 내용 주석 해제
AddHandler cgi-script .cgi
Nagios 웹 접속용 사용자 계정 만들기
1. 사용자 계정 만들기
# 아래 명령어를 입력
htpasswd -c /usr/local/nagios/etc/htpasswd.users nagiosadmin

New password: [설정할 비밀번호]
Re-type new password: [비밀번호 재입력]

# 성공시
Adding password for user nagiosadmin

# httpd 재실행
systemctl restart httpd
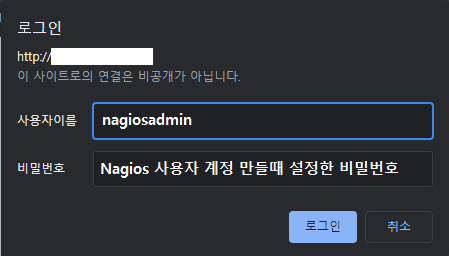
2. 웹 접속
웹에서 IP/nagios 혹은 IP:80포트/nagios 로 접속 시도


Nagios Plugin 설치
1. wget으로 설치
설치를 받을 디렉토리 이동 : cd /usr/local/src
wget --no-check-certificate -O nagios-plugins.tar.gz https://github.com/nagios-plugins/nagios-plugins/archive/release-2.2.1.tar.gz
2. 설치한 .tar.gz 압축해제
# .tar.gz 압축 해제
tar xvfz nagios-plugin.tar.gz

# 해제한 파일로 이동
cd nagios-plugin-release-2.2.1
3. Nagios Plugin 컴파일
# 컴파일 설치
./tools/setup
./configure

make && make install
4. Nagios 재시작
# 재시작
systemctl stop nagios
systemctl start nagios

# 상태 보기
systemctl status nagios
Nagios NRPE 설치
1. yum으로 패키지 설치
yum install mod_ssl openssl-devel gcc make openssl perl xinetd
# 이미 깔려 있을 경우 결과
Nothing to do
2. wget으로 NRPE 설치
wget https://github.com/NagiosEnterprises/nrpe/archive/nrpe-2-15.tar.gz
3. .tar.gz 압축 해제
# 압축해제
tar xvfz nrpe-2-15.tar.gz

# 해제한 파일로 이동
cd nrpe-nrpe-2-15/
4. Nagios NRPE 컴파일
# 컴파일 설치

# NRPE를 통하여 인수를 전달하기 위해 --enable -comman-args 옵션을
# 지정해야하며, 옵션을 넣어주지 않았을 경우 모든 인수가 모니터 되는
# 각 서버의 nrpe.cfg 파일에 명시적으로 설정되어야 합니다.
./configure --enable-command-args
make
make install

make all
make install-plugin
make install-daemon
make install-daemon-config
make install-xinetd
5. Nagios NRPE 샘플 파일 복사
cp -arp sample-config/nrpe.cfg /usr/local/nagios/etc/
6. xinetd 설정
# 해당 경로 파일 수정
vi /etc/xinetd.d/nrpe

# default: on
# description: NRPE (Nagios Remote Plugin Executor)
service nrpe
{
        flags           = REUSE
        socket_type     = stream
        port            = 5666
        wait            = no
        user            = nagios
        group           = nagios
        server          = /usr/local/nagios/bin/nrpe
        server_args     = -c /usr/local/nagios/etc/nrpe.cfg --inetd
        log_on_failure  += USERID
        disable         = no
        only_from       = 127.0.0.1 [모니터링 대상 ip]
}


# vi 편집기 실행
vi /etc/services

# 아래 내용을 추가
nrpe            5666/tcp                        # NRPE

# 저장 후 종료
esc
:wq
7. check_nrpe 내용 추가
# vi 편집기 실행
vi /usr/local/nagios/etc/objects/commands.cfg

# /check_ 를 이용해 'check_...' 항목을 찾는다
# 아래 내용을 추가한다.

#'check_nrpe' command definition
define command{
   command_name check_nrpe
   command_line /usr/local/nagios/libexec/check_nrpe -H $HOSTADDRESS$ -c $ARG1$
  }

# xinetd 재실행
systemctl restart xinetd.service
8. 모니터링 서버 추가하기
# 경로
cd /usr/local/nagios/etc/objects/

# localhost.cfg 복사
# 복사할 때 새로운 파일 이름은 본인이 하고 싶은대로
cp -rp localhost.cfg [파일이름].cfg

# 복사한 파일을 수정한다
# 위에서 본인이 지정한 파일이름으로 .cfg를 vi 편집기로 연다.
vi [파일이름].cfg
이 아래로 SERVICE DEFINITIONS에 해당하는 내용에서 host_name을 "전부" 위에서 지정한 host_name으로 바꾸어야 한다.

8. Nagios Config 설정
# vi 편집기 실행
vi /usr/local/nagios/etc/nagios.cfg

# 추가해준 모니터링 서버의 .cfg를 nagios.cfg에 추가해줘야 한다.
cfg_file=/usr/local/nagios/etc/objects/[파일이름].cfg
[ 모니터링 대상 서버 (클라이언트) ]
1. 패키지 설치
yum install -y gcc glibc glibc-common gd gd-devel make net-snmp openssl-devel
2. 유저 생성
useradd nagios
passwd nagios
Nagios Plugin 설치
1. wget으로 설치
설치 경로 : cd /usr/local/src
wget --no-check-certificate -O nagios-plugins.tar.gz https://github.com/nagios-plugins/nagios-plugins/archive/release-2.2.1.tar.gz
2. 설치한 .tar.gz 압축해제
# .tar.gz 압축 해제
tar xvfz nagios-plugin.tar.gz

# 해제한 파일로 이동
cd nagios-plugin-release-2.2.1
3. Nagios Plugin 컴파일
# 컴파일 설치
./tools/setup
./configure

make && make install
4. 파일 소유자 변경
chown nagios.nagios /usr/local/nagios
chown -R nagios.nagios /usr/local/nagios/libxec
Nagios NRPE 설치
1. yum으로 패키지 설치
yum install mod_ssl openssl-devel gcc make openssl perl xinetd
# 이미 깔려 있을 경우 결과
Nothing to do
2. wget으로 NRPE 설치
wget https://github.com/NagiosEnterprises/nrpe/archive/nrpe-2-15.tar.gz
3. .tar.gz 압축 해제
# 압축해제
tar xvfz nrpe-2-15.tar.gz

# 해제한 파일로 이동
cd nrpe-nrpe-2-15/
4. Nagios NRPE 컴파일
# 컴파일 설치

# NRPE를 통하여 인수를 전달하기 위해 --enable -comman-args 옵션을
# 지정해야하며, 옵션을 넣어주지 않았을 경우 모든 인수가 모니터 되는
# 각 서버의 nrpe.cfg 파일에 명시적으로 설정되어야 합니다.
./configure --enable-command-args
make
make install

make all
make install-plugin
make install-daemon
make install-daemon-config
make install-xinetd
5. xinetd 설정
# 해당 경로 파일 수정
vi /etc/xinetd.d/nrpe

# default: on
# description: NRPE (Nagios Remote Plugin Executor)
service nrpe
{
        flags           = REUSE
        socket_type     = stream
        port            = 5666
        wait            = no
        user            = nagios
        group           = nagios
        server          = /usr/local/nagios/bin/nrpe
        server_args     = -c /usr/local/nagios/etc/nrpe.cfg --inetd
        log_on_failure  += USERID
        disable         = no
        only_from       = 127.0.0.1 [모니터링 서버 ip]
}


# vi 편집기 실행
vi /etc/services

# 아래 내용을 추가
nrpe            5666/tcp                        # NRPE

# 저장 후 종료
esc
:wq
설정 확인
모니터링 하는 서버에서 확인
/usr/local/nagios/libxec/check_nrpe -H [모니터링 대상 서버의 IP]
모니터링 받을 서버에서 확인 (클라이언트)
/usr/local/nagios/libxec/check_nrpe -H [모니터링 하는 서버의 IP]
host groups 설정
모니터링 하는 서버에서 진행
1. localhost.cfg에 있던 host group 설정 줄을 모두 복사 후 삭제
# vi를 이용하여 localhost.cfg 를 편집
vi /usr/local/nagios/etc/objects/localhost.cfg

###############################################################################
###############################################################################
#
# HOST GROUP DEFINITION
#
###############################################################################
###############################################################################

# Define an optional hostgroup for Linux machines

define hostgroup{
        hostgroup_name  linux-servers ; The name of the hostgroup
        alias           Linux Servers ; Long name of the group
        members         localhost     ; Comma separated list of hosts that belong to this group
        }
2. hostgroups.cfg 파일 생성
# vi를 이용하여 생성
vi /usr/local/nagios/etc/objects/hostgroups.cfg

# 복사 해두었던 내용을 붙여넣고 members를 수정

###############################################################################
###############################################################################
#
# HOST GROUP DEFINITION
#
###############################################################################
###############################################################################

# Define an optional hostgroup for Linux machines

define hostgroup{
        hostgroup_name  linux-servers ; The name of the hostgroup
        alias           Linux Servers ; Long name of the group
        members         localhost, [새로 만들어준 host_name 입력]     ; Comma separated list of hosts that belong to this group
        }
3. nagios.cfg에 파일 추가
# vi를 이용하여 수정
vi /usr/local/nagios/etc/nagios.cfg

# 아래 내용 추가
cfg_file=/usr/local/nagios/etc/objects/hostgroups.cfg
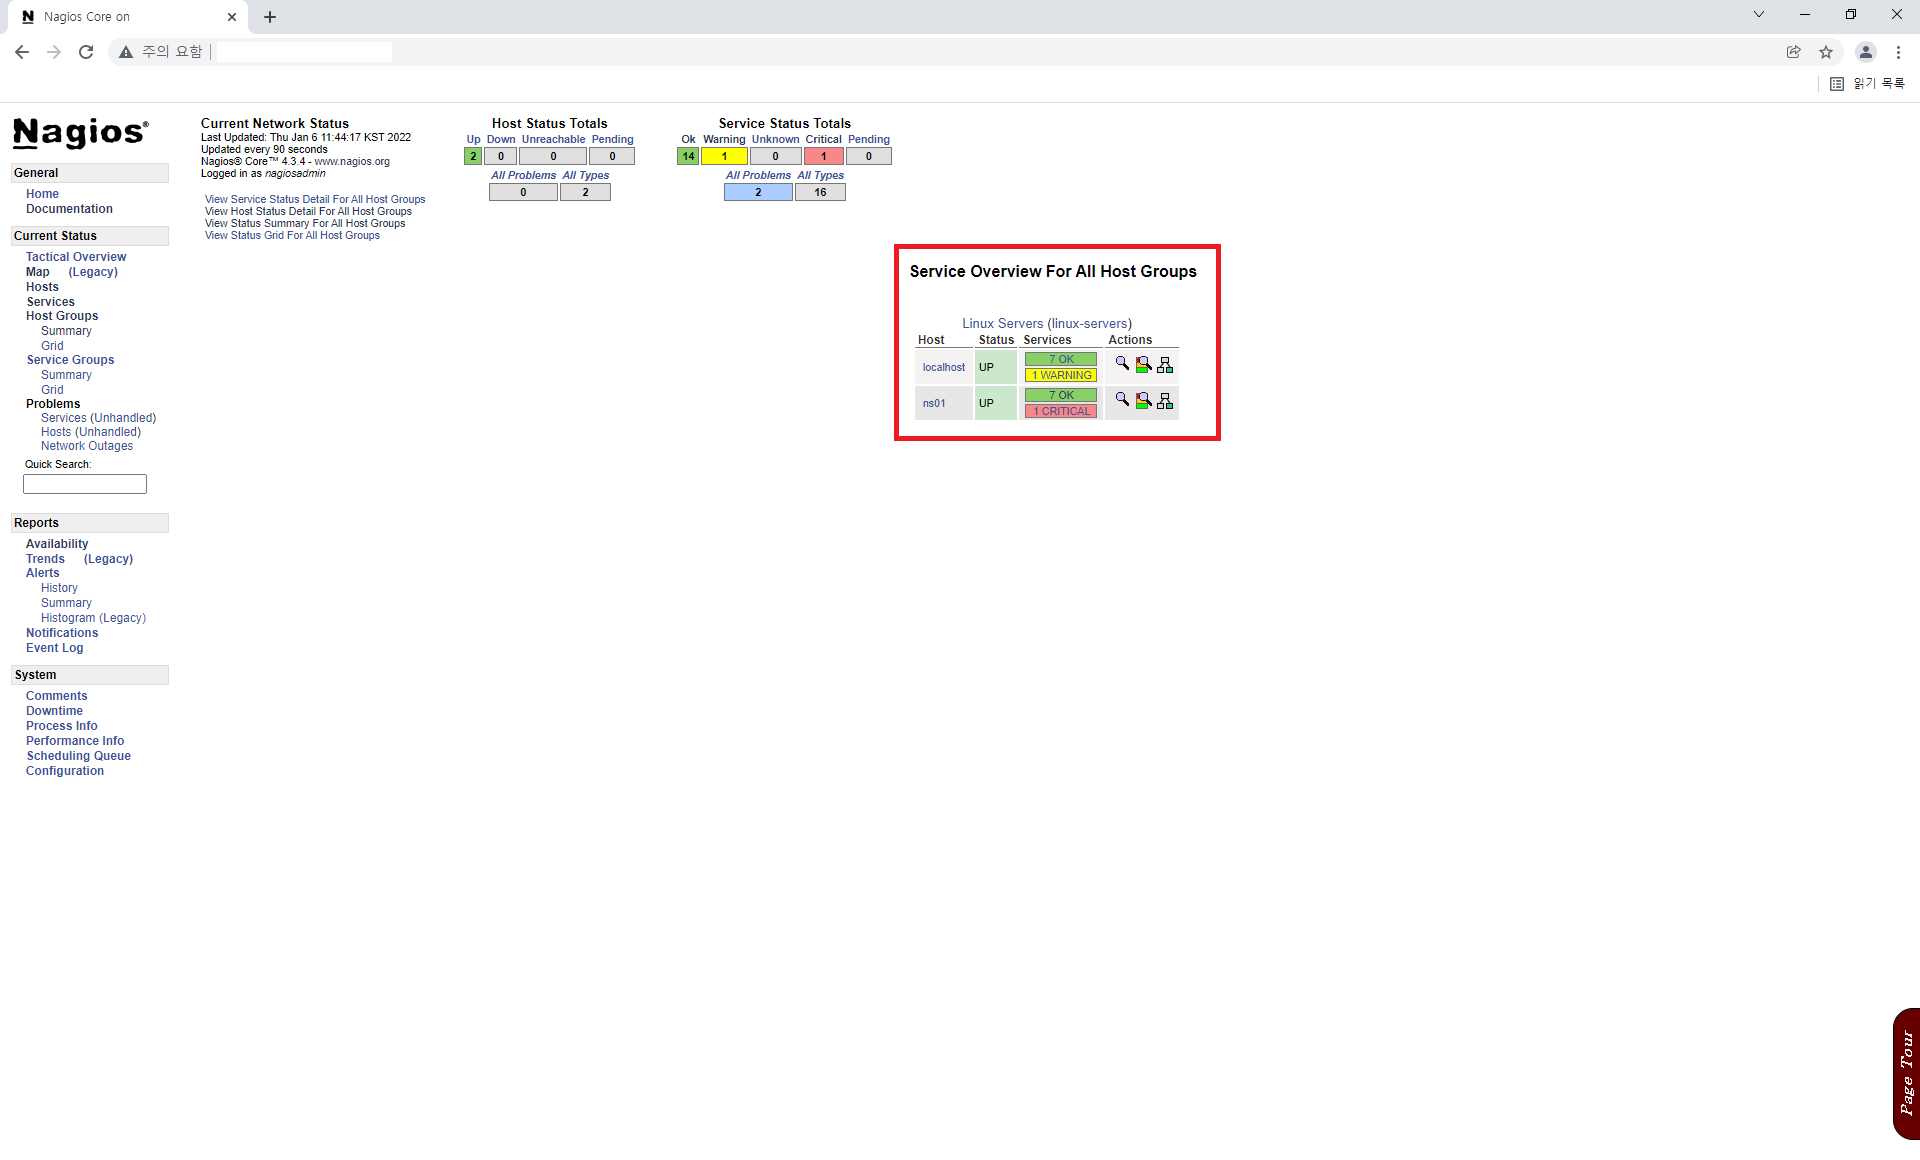
4. Nagios Host Groups에서 확인
# 확인 전 나기오스 재실행
systemctl restart nagios

'회사 > 과제' 카테고리의 다른 글
| 리눅스 시스템 권한 (0) | 2022.01.07 |
|---|---|
| Munin (0) | 2022.01.07 |
| LVM (0) | 2022.01.03 |
| 리눅스 기본 명령어 50개 (0) | 2021.12.30 |
| MySQL Replication 이중화 (0) | 2021.12.29 |
